
|
1967
GTX |
|||||
|
|
|||||
|
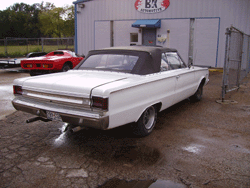
95% of the people who saw the movie 'Joe Dirt' remember the orange Hemi he was given,... but have no idea what type of car it was. It was supposed to be a 1967 Hemi GTX, but was in fact a 1967 Plymouth Belvedere cloned into a GTX look-alike. Lets overlook the fact the the racing stripes are from the wrong year.... |
 |
||
| No doubt, its a great looking car, and like all mopars it has an interesting history. It first appeared in 1967, basically a Belvedere II, only with upgraded options in performance, styling and amenities. Positioned as Plymouth's "gentlemen's" hot rod, the GTX offered stylish performance for the discriminating buyer. You can credit its name to the first muscle car, the 1964 GTO created by John DeLorean. Many car makers were starting to adopt the 'little car + big engine' formula, and at the same time coming up with similar letter designators, as done with the GTO, GTX, SS and so on. |
 |
 |
|
|
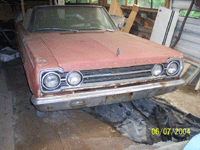
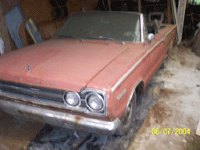
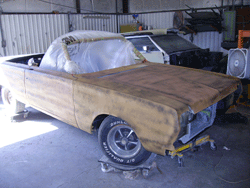
I fell in love with this car, the history and styling. I wanted one, and it had to be a convertible. I started looking around for one in 2004 that I could turn into a Joe Dirt replica, and what I found was this ancient 1967 Plymouth Belvedere II convertible. I planned to perform the Joe Dirt treatment with some performance modifications. However, once the car arrived.... |
 |
 |
|
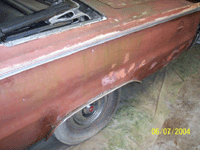
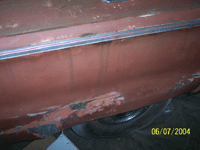
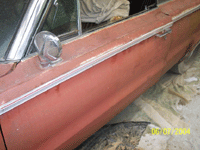
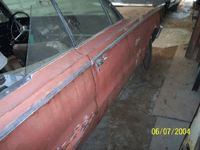
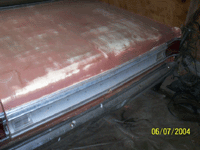
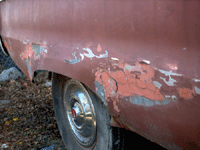
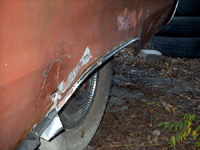
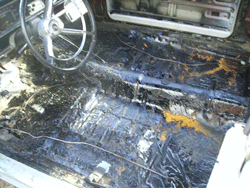
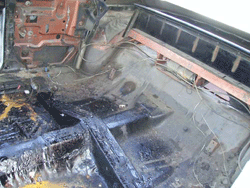
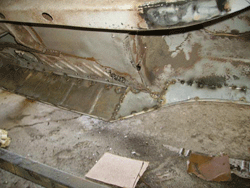
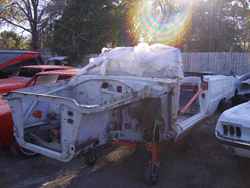
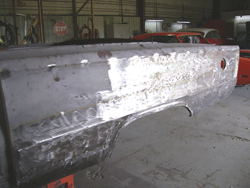
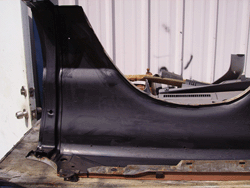
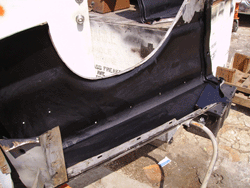
| It really was in sad shape. It came to us from North Carolina, but came to them from New York.... whether or not the duct tape holding the quarter panels in place was put there in NY or NC I am not sure. :) |
 |
 |
|
|
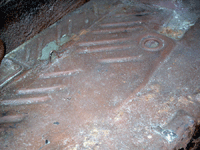
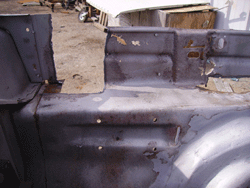
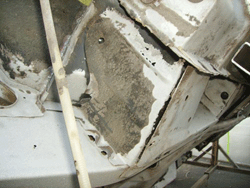
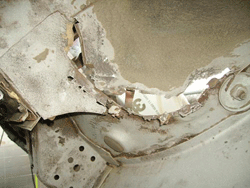
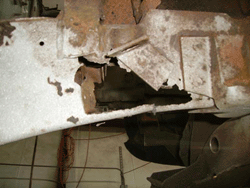
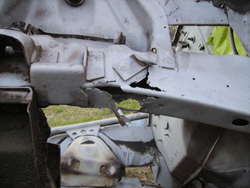
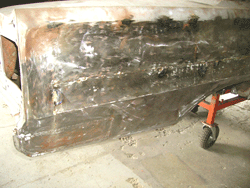
Someone got creative with a rivet gun and drill, and snapped very flimsy metal (maybe 88 gauge for all I know, looks like tin foil) to the rusted quarters. After inspection, I think it might have been air duct flashing.... That duct tape was not a joke either, by the way, that's what they used to insure their rivet job would hold on, then capped it all off with a nice thick coat of bondo.... (I am being serious, you following me? tin foil, staples, rivets, duct tape, bondo.... try to keep up). |
 |
 |
|
|
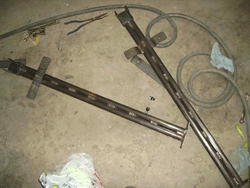
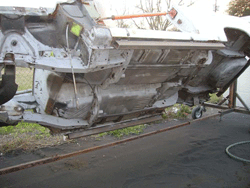
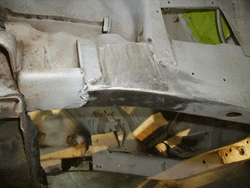
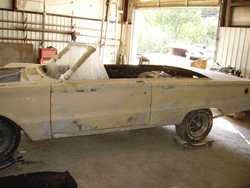
We were fortunate to receive this car at all. The transport arrived late at night and as soon as he settled in the parking lot, the crossmember (completely rusted through) gave loose and splintered into shards,.. (maybe there was duct tape on it too that blew off somewhere on I-10. Keep an eye out ....) So the driveline jackknifed and wedged it onto the trailer. I had to hook a chain to the rear end and yank it loose with my Tahoe. Then the block of wood that someone had wedged between the subframe and lower control arm to make the car appear level fell out due to all the tugging and the whole car laid frame... |
 |
 |
|
|
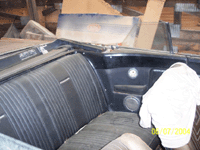
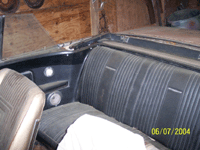
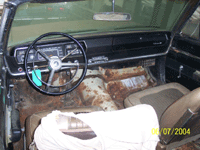
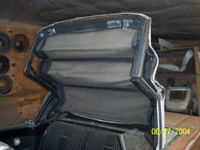
Well, we still had about 100 yards to go, so it slide on its belly most of the way.... On the plus side,.. the dash was MINT and the top worked fine. (I had to win somewhere). |
 |
 |
|
|
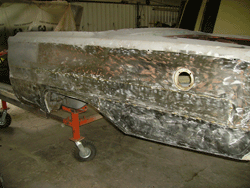
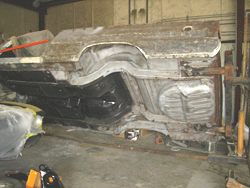
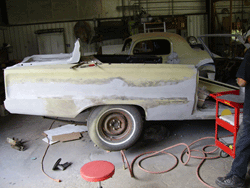
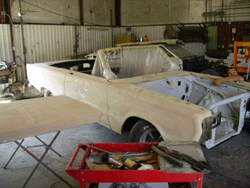
I finally had a clear morning to finish my inspection, and it was worse than I thought. This car needed a full nut and bolt buildup, not really what we do for TV and Movie replicas. This project just went from $20k to $120k. I decided to scrap the original idea and for now just do some patchwork. Make it a driver I can play with while I make up my mind what to do with it, and if need be save up some money and parts. |
 |
 |
|
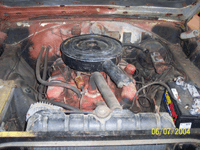
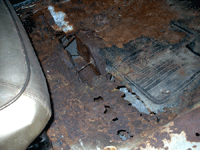
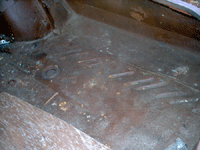
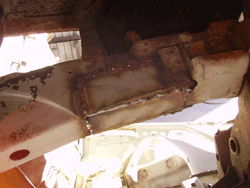
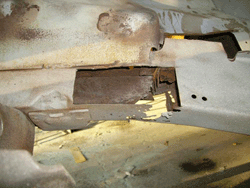
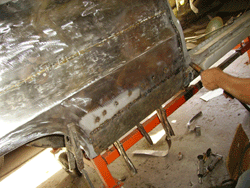
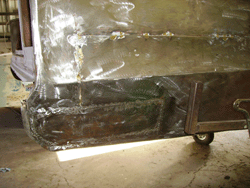
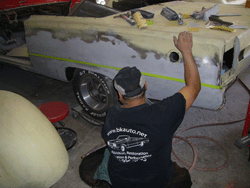
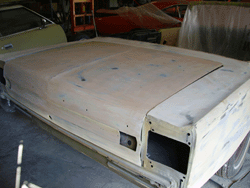
| Front floors gone, quarters gone, carpet gone.... but it is a matching numbers 383 with 727 auto. I rebuilt the engine in my garage and did some quick patching on the floors and ALOT of filler on the quarters. I replaced the front buckets with the Joe Dirt split bench (which is cheaper to recover and saves me from doing a console). The top was OK, so I dyed it black. |
 |
 |
|
| I polished the trim and put some good wheels and tires on it. All new fuel system, all new suspension with HEMI leaf springs, converted to the GTX racing cap, and painted it on a free weekend. Its putting a Band-Aid on a bullet wound, I know the car won't last long but I can enjoy if you alittle while while I decide to sell it and try again, or go for the full overhaul. |
 |
 |
 |
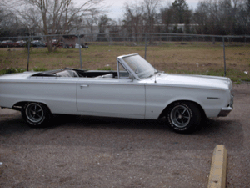
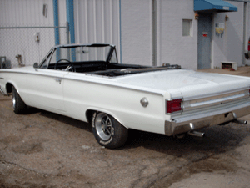
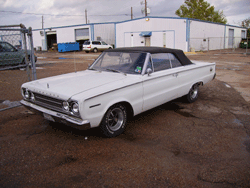
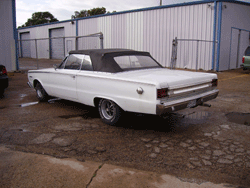
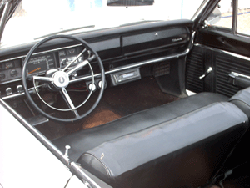
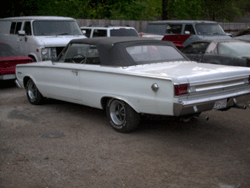
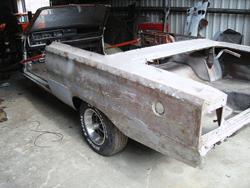
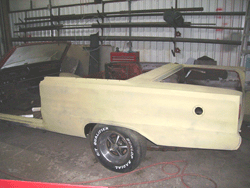
| I bought the car in the summer of 2004, and had it done by Christmas. I did alot in my garage at home, away from work, and didn't keep very good records since what I was doing I didn't want to remember. However, it shined up nice once it was all said and done. These are the first completed photos taken in Jan 05. | 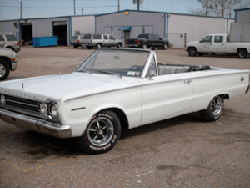 |
 |
 |
 |
 |
 |
 |
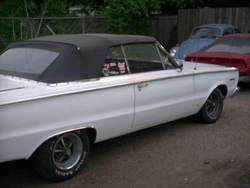
| It didn't last long, I made it through the summer, had a great time with the car but it really was a cheaper fix-up job and it started to show. It is true what I tell my customers, about doing it right the first time. But it served it purpose, I had alot of time to enjoy the car and think it over, and I wanted the whole tamale. | 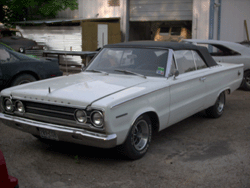 |
 |
 |
|
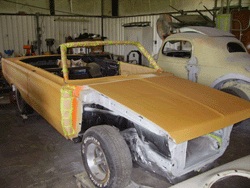
We'll take the car down to nothing, start from scratch, and we'll still use the Joe dirt theme, because I think it is fun. But if I am spending this much time and money, we are going to go all out. I'll store the matching 383 in exchange for a 550HP Max Wedge 440 setup, the Dana 60 I love so much and all Firm Feel suspension. If I am going to do that then I'll need to make major reinforcements to the chassis. I don't want to leave anything out, because I estimate this to cost around $80k not counting my own labor. I should mention, that's my costs, and I own the shop. If you want to run with the big boys, you gotta spend like the big boys.
|
 |
 |
|
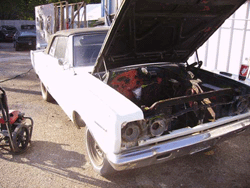
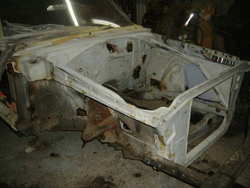
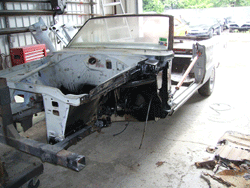
| It took me another year to plan and prepare to start this project. I started by tearing the car down. Kody helped me pull the engine over the weekend, but the rest I did solo. Its my car, so I want to do as much as possible with my own two hands. Plus, keeps the costs down and doesn't steal shop time from any other projects, and currently we are booked solid. | 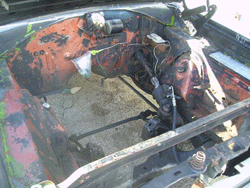 |
 |
 |
|
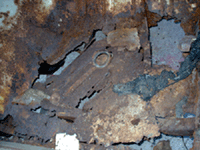
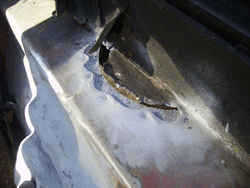
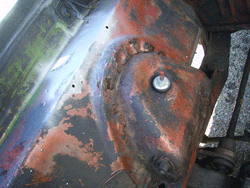
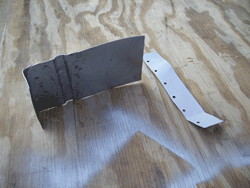
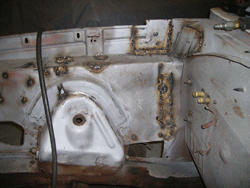
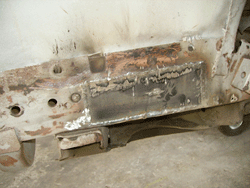
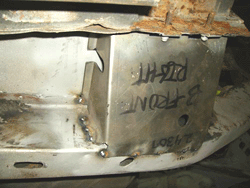
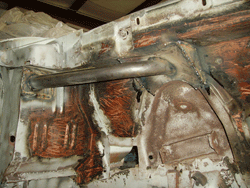
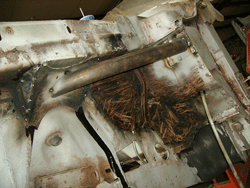
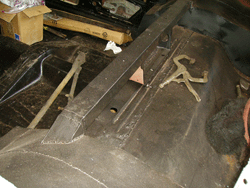
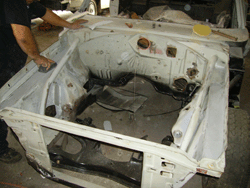
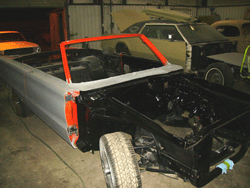
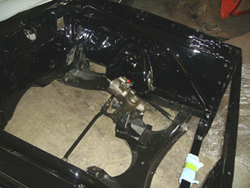
Almost every joint on this car is rusting or already rusted through. Both shock mount joints were trash... looking at this now I can't believe I put it on the road. I'm lucky to still be here. I'll start in the engine bay, so let make some patch panels. |
 |
 |
|
| Here you can see before and after on the mount joints. I removed and replaced the entire joint a few inches at a time and used All Metal for filler where needed. I will not be using any polyester filler on this car. It will add alot of bodywork hours, but the work will last twice as long. | 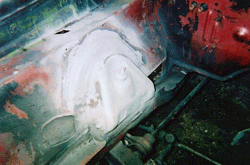 |
 |
|
|
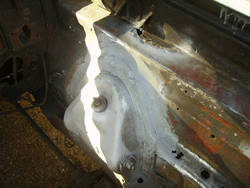
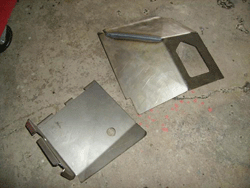
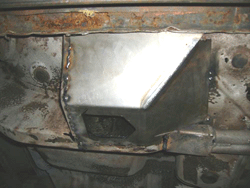
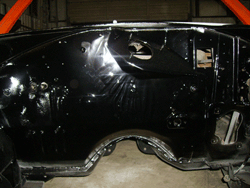
For now, I blasted the engine bay by itself. One thing at a time since I am doing most of this on weekends and evening hours. There are not many replacement panels available for this car, so I'll be making most by hand. Here you can see where I have removed bad sections in order to replace. |
 |
 |
 |
|
Here is a good example of what I am having to do. Being good with a sandbag and English wheel helps. I have handmade the patch pieces for this fender, and also test fitting part of the reinforcement cage for the engine bay. |
 |
 |
|
|
Here are the patches made and installed. The bracing in and around the engine bay is very important, especially with high HP engines. Over half of the 'body roll' or 'sloppy suspension' felt in these cars is actually due to the engine bay twisting under the weight of the engine. |
 |
 |
|
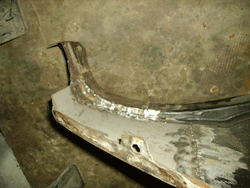
| We ended up having to torch out the old control arms.... gave me a few more patches to make. | 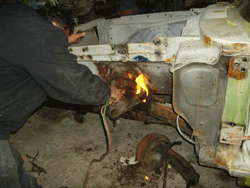 |
 |
 |
|
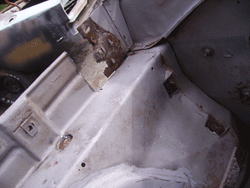
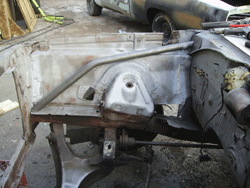
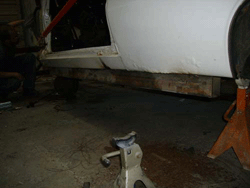
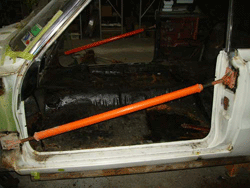
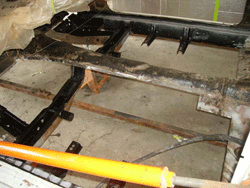
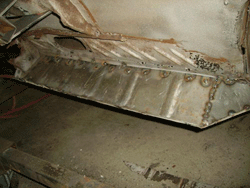
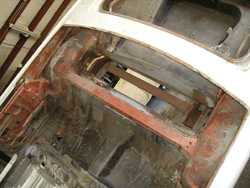
With the car on the rotisserie and the engine bay finished for now, I turned my attention to the floors. Before anything is removed, we use these jamb braces to stiffen the body. This is VITAL on convertibles. |
 |
 |
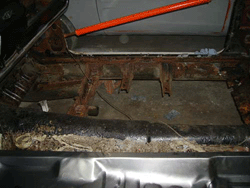 |
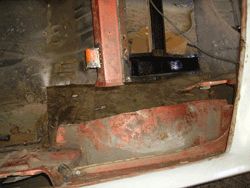
| The quick patches I made before were easy enough to remove, but I still had to clean the old floor braces before installing the new floor. | 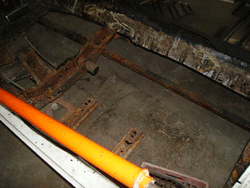 |
 |
 |
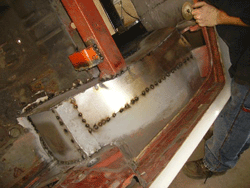
| Here I am preparing the new floors for installation, with proper mounting holes for the braces and of course weld through priming on areas I will not be able to reach later. All of this preparation may seem like alot of slow, expensive work but this is what makes us one of the very few true restoration shops and separates us from all of the other body shops and paint shops that put restoration in their name. You get what you pay for, and this attention to detail will help this car last a long, long time. |
 |
 |
|
|
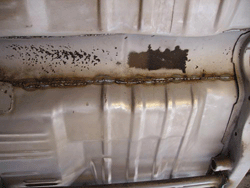
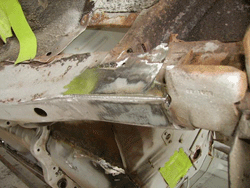
These are our subframe connectors. There are two main styles sold through aftermarket suppliers and used by most people, and that would be the square braces, which is one solid square tube, and the new 'laser cut, made to fit the floor' braces. Both of these are trash. What you see here is the best type of bracing to use for subframe connection. The tube shape is much stronger than the square shape, and in this case it is doubled with two tubes. Also, the made to fit models offer the least protection because of their design. This style also has several short welds instead of a long solid weld, which is for increased reliability. A weld can crack, then then it works like a zipper, the entire length of the weld. With this method, should a weld fail, it does not compromise the integrity of the rest of the brace. |
 |
||
|
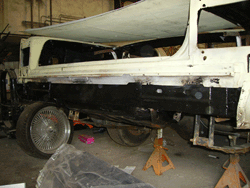
With the floors done, we'll finish the blasting and start working on the main chassis. I am seriously surprised that my car didn't collapse under its own weight. I don't have much of a frame left. You may notice in this photo we welded 2x4 thick wall steel brace under each rocker the length of the car to help support the rusty old girl while on the twirler. |
 |
 |
 |
|
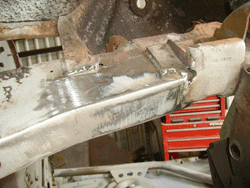
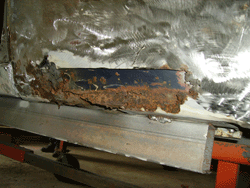
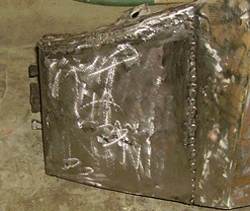
1) Below is a completely rusted frame section. We start cutting away metal around the rusted area and get us a clean opening to patch. |
2) Patch panels are made based on the area to repair In this case, being a frame we went with thick gauge steel, double the size of the stock material. |
3) We are then able to grind the weld until there is no trace that repairs were done.
|
4) Here you can see the finished repair.
|
 |
 |
 |
 |
 |
 |
 |
 |
|
These little extension panels under the trunk are unavailable and have to be made by hand, like most everything else. That is a handmade panel. This is called fabrication. Other 'restorers' would have you believe cutting out a square piece of metal and welding it over a hole is fabrication.... now you know. |
 |
 |
|
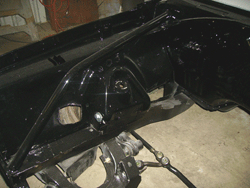
| Next I install the torque boxes. You'll have these on all HEMI and convertible mopars |
 |
 |
 |
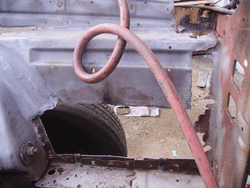
| The rear wheel wells are shot, and unavailable. Since we are making them from scratch anyway, we opened them up abit for a mini-tub. Now I'll have more options for wider wheels and tires when we get to that point. |
 |
 |
 |
|
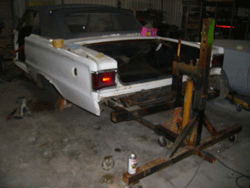
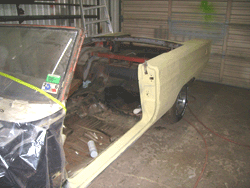
Off the rotisserie and onto the body cart while the chassis repairs are made. While we are at it, we'll finish the front apron reinforcements. |
 |
 |
 |
|
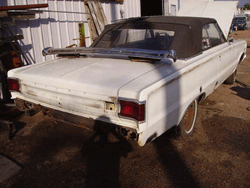
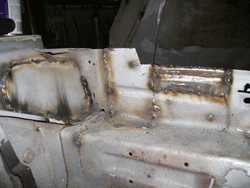
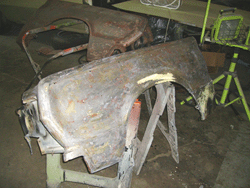
Now lets look at these quarters, all five of them. Repairs were done at several different times in prior years, and instead of replacing anything someone saved a few bucks by taking quarters from a donor car and welding them right on top of the rusty ones. We have three deep on one side.... |
 |
 |
 |
| It takes alot of work to repair this mess, but with enough patience and skill, it comes out right in the end. |
 |
 |
 |
|
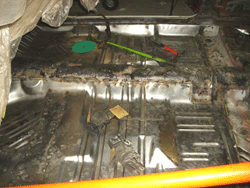
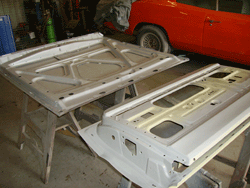
The new trunk pan is installed, that's a new piece that just became available. We have started undercoating areas as we finish with them. |
 |
||
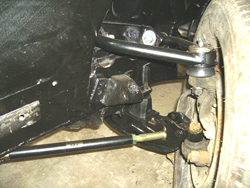
| With the welding on the quarters finished, and undercoating finished, we moved to installing the new front suspension from Firm Feel. Hand fabricated tubular upper control arms, reinforced lowers, and fully adjustable strut rods. |
 |
 |
 |
| To keep flash rusting at bay, and to buy alittle insurance we use an etching primer (also known as a wash) on the bare steel. |
 |
 |
|
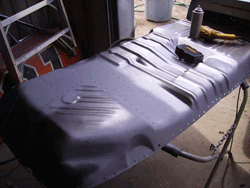
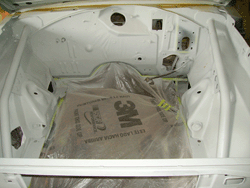
| Trunk POR-15 coated |
 |
We used the convertible top support beam as an additional
reinforcement by stretching the ends to meet our mini-tubs.
|
 |
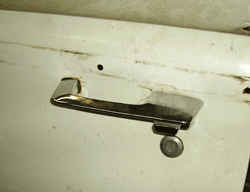
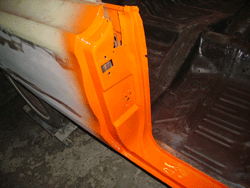
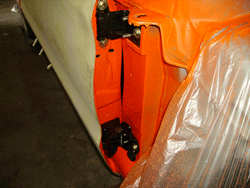
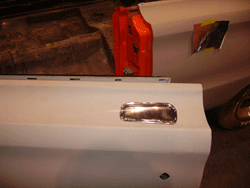
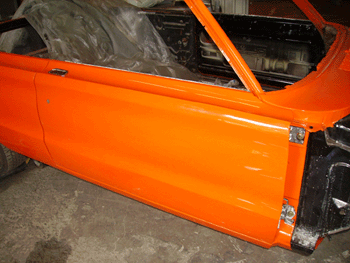
| The original handles on MOPAR b-bodies drive me up the wall. The door is never properly reinforced and eventually ends up rusting out or cracking the steel from stress. I decided to get rid of mine altogether in favor of a handle that would fit more with the cars lines and improve its functionality and reliability. |
 |
 |
|
|
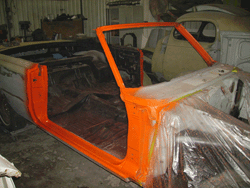
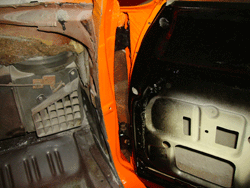
Back to body repairs. The doors were finished and installed in preparation for surfacing and blocking. |
 |
 |
 |
| Engine bay blocked smooth and rear bumper brace is removed for replacement with a great condition original piece we found on EBAY. |
 |
 |
|
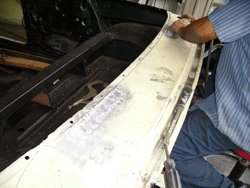
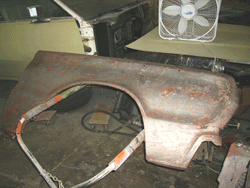
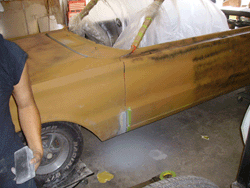
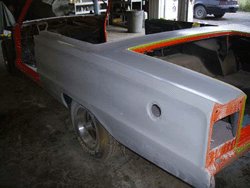
| ALOT of body work to get these quarter back into presentable shape. It'll be nice when someone finally makes a replacement quarter panel for this car. In the meantime, its elbow grease. |
 |
 |
 |
|
Since I am having to do this car here and there in between customer jobs, I don't get to do everything at once as I would like. That being the case, the door jambs were primed, blocked, wetsanded and painted. |
 |
 |
|
| Same with the windshield brace. |
 |
 |
|
| Next, hinges coated and doors installed and aligned with new hardware. |
 |
 |
|
| Engine bay primed |
 |
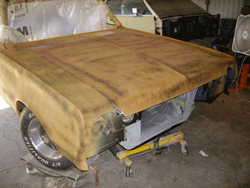
Body work complete and car is in surfacer and ready for
blocking.
|
 |
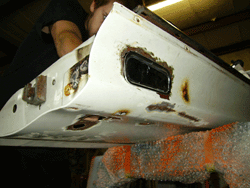
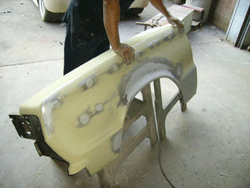
| Been wondering where the fenders were? My passenger fender was shot, so I have been trying to find a replacement, and thanks to the Internet I now have one. We strip the fenders down and see what needs to be done. |
 |
 |
|
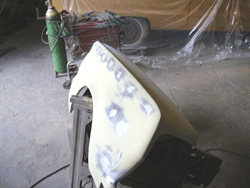
| Before we get too far, we POR-15 the insides of the fenders to protect from corrosion. |
 |
 |
| Another piece that is unavailable, so we make a patch for the fender as well as fabricate a new inner fender mount and brace. |
 |
 |
|
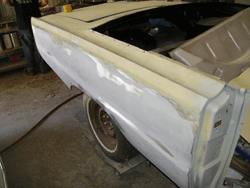
| We are not putting the Belvedere side trim back on, so the holes must be welded shut. Here the fenders are finished with body work and ready for surfacer and installation for blocking. |
 |
 |
|
| Guidecoat and final repairs in preparation for blocking. |
 |
 |
 |
| First blocking session. More repairs to make, and still a long way to go before I am happy. |
 |
 |
 |
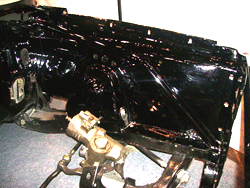
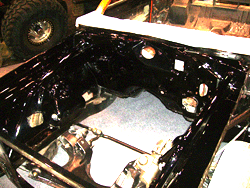
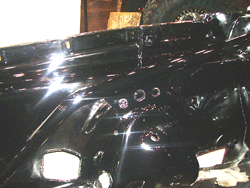
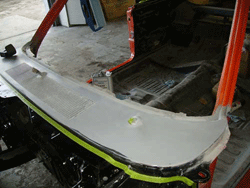
| Engine bay painted. |
 |
 |
 |
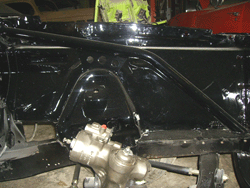
| Firm Feel performance 'quick-ratio' power steering gearbox installed along with the heavy duty steering linkage. |
 |
 |
|
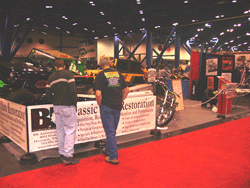
| We used the car to show examples of different processes involved with restoration at the Houston AutoRama show. |
 |
 |
 |
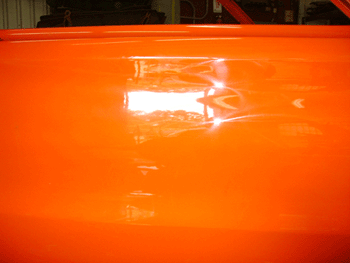
| The paint I used for the engine bay is a photochemicaly reactive House of Kolors blend that has a very impressive shine. |
 |
 |
 |
| Here you can better see what I have in mind for the door handles. |
 |
 |
|
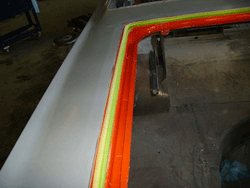
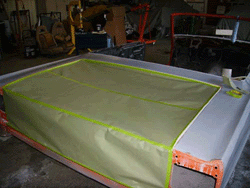
| Time for paint. Taping is one of the most important parts of a good paintjob. Too many people rush through it or just slap things together. There is a precise method and it takes some time, but it makes a big difference in the finished quality. |
 |
 |
 |
 |
 |
 |
|
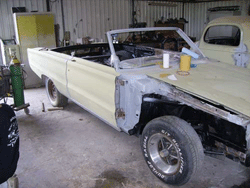
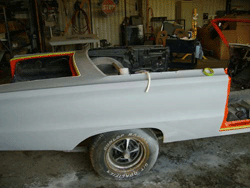
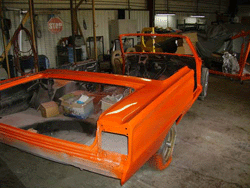
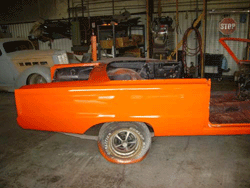
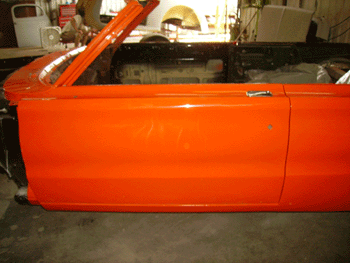
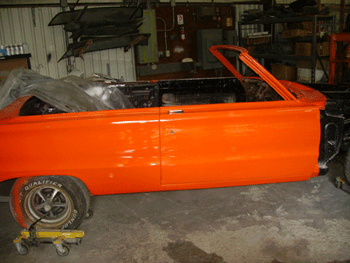
| Finally with some color. |
 |
 |
 |
|
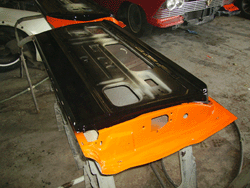
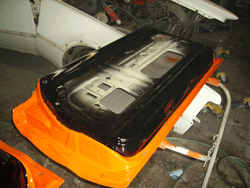
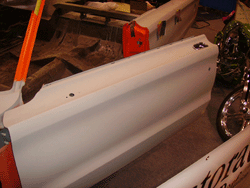
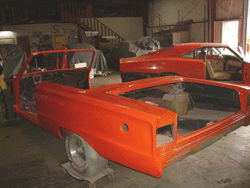
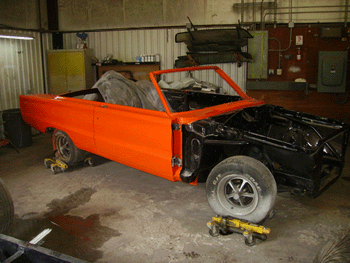
Another few weeks pass and I finally get time to paint the doors and decklid. Here you can see them getting installed. What a brilliant color! |
 |
 |
 |
 |
 |
 |
 |
 |
|
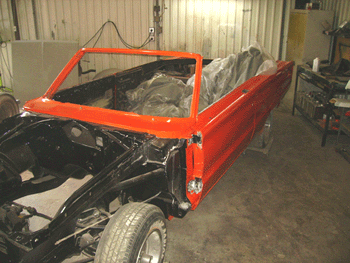
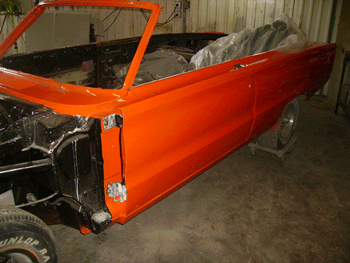
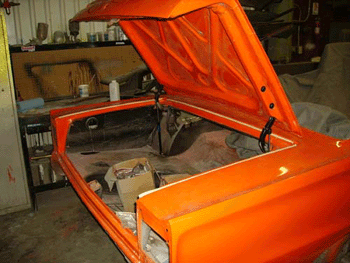
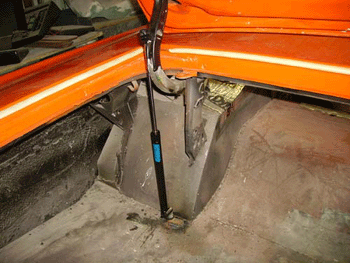
Now I get to install the decklid. I toyed with the idea of installing a power actuated arm to remotely open the decklid, but its just too 'Funky-Flex Master' for my tastes. I opted instead for hydraulic assist arms so my trunk will work same as before,... only I won't need Lou Ferrigno to open it for me. |
 |
 |
|
|
|
For information on
replica or restoration services: BKautomotive@sbcglobal.net
|
|